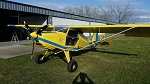
1. NEW bunges, and Safety Cable (they wear out fast)
2. NEW bolts, washers, nuts and cotter pins (AN4-24 x 8, AN4-22 x 6)
3. A 36" 1/4 Reamer
4. NEW GEAR AXLE IS LONGER.....BE SURE YOU HAVE THE BUSHING
You will need to lift the airplane 40" of the ground.....good luck....my backache will be weeks from recovery.
Please Check the parts before you start.
My holes on one leg varied by up to an 1/8 of an inch.
Lynn