

I would love to if I was closer. It's kit number 5 for mestede52 wrote:Troy,
Beautiful work!! you want to help me with my Carbon Cub?
Super STOL Build Pics
-
Familyflyer
- Veteran Member
- Posts: 211
- Joined: Thu May 16, 2013 5:10 pm
Re: Super STOL Build Pics
-
orenjr
- Seasoned Member
- Posts: 62
- Joined: Tue Sep 17, 2013 6:58 am
Re: Super STOL Build Pics
Troy
Any new pictures you can share?
I noticed that you had the small header tank.
The 914 needs the larger header tank.
Thanks! Oren
Any new pictures you can share?
I noticed that you had the small header tank.
The 914 needs the larger header tank.
Thanks! Oren
-
Familyflyer
- Veteran Member
- Posts: 211
- Joined: Thu May 16, 2013 5:10 pm
Re: Super STOL Build Pics
Yes I do have the large header tank, the factory should not have shipped the small tank out. I will get some more pictures up. I have been busy covering and should start painting soon.orenjr wrote:Troy
Any new pictures you can share?
I noticed that you had the small header tank.
The 914 needs the larger header tank.
Thanks! Oren
-
Familyflyer
- Veteran Member
- Posts: 211
- Joined: Thu May 16, 2013 5:10 pm
Re: Super STOL Build Pics
Here is a bit of an update.
Here is a side shot of the wing route.

I masked all the fuselage for painting.

I brushed the two coats on and got to spraying.

The filler primer went on with little trouble and looked good.

After all the coats of filler primer, I then sprayed the white primer for better color of the top coat. I also masked all the powder coated areas as the filler primer does not stick well to powder coat. The masking came off for the white primer as it sticks much better to the powder coat.

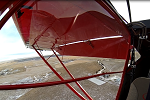
I put fabric around the windows to help hide the hysol glue. It made the window look quite good.

I rib laced all the empenage. This is what it looks like. It did not take much time and the fabric was much tighter with it done.

This is what it looks like with the tapes on.

I have brushed the filler primer on one wing and it is ready for spraying. Just waiting for outside temps to be better that -20c as high to get spraying again!

The engine should arrive in march and my avionics are soon shipping from Stein. All good so far.
Here is a side shot of the wing route.
I masked all the fuselage for painting.
I brushed the two coats on and got to spraying.
The filler primer went on with little trouble and looked good.
After all the coats of filler primer, I then sprayed the white primer for better color of the top coat. I also masked all the powder coated areas as the filler primer does not stick well to powder coat. The masking came off for the white primer as it sticks much better to the powder coat.
I put fabric around the windows to help hide the hysol glue. It made the window look quite good.
I rib laced all the empenage. This is what it looks like. It did not take much time and the fabric was much tighter with it done.
This is what it looks like with the tapes on.
I have brushed the filler primer on one wing and it is ready for spraying. Just waiting for outside temps to be better that -20c as high to get spraying again!
The engine should arrive in march and my avionics are soon shipping from Stein. All good so far.
-
mac
- Seasoned Member
- Posts: 60
- Joined: Sun Jul 29, 2012 7:57 pm
- Location: Grass Valley, CA.
Re: Super STOL Build Pics
Troy:
Thanks for the pics. Always helpful. Always!! Please keep it up.
That said.........have one question. Know you are using the Stewart's system, paint, etc., but wondering what kind of spray equipment you've had success with? Can you recommend a gun to use? Currently setting up a paint booth and the spray gun is the next "investment" to make! My 12-year old equipment isn't hacking it anymore...........
Thanks.
Mark M.
N49SS in Phase 2....for good!
N49SS in Phase 2....for good!
-
Familyflyer
- Veteran Member
- Posts: 211
- Joined: Thu May 16, 2013 5:10 pm
Re: Super STOL Build Pics
I am using the Sata 4000 with the digital pressure guage. I use all the disposible cups which makes clean up easy. The screens are inside the cups so that helps to. You just have to worry about cleaning the gun when you are finished. You will need a 60gal compressor as well and a real good air line filter set up. The filters are as much as the compressor  Make sure you do not use any quick connects in the line other than just at the gun, it should be a high flow at the gun. The filter system I use is the Devilbiss. My understanding is their guns are very good to use as well and cheaper that the Sata. The Sata they say is the best of the best. I only wanted me to be the part that screws up and not the equipment.
As for the paint tent, make sure you have really good airflow. The filler primer really plugs the filters fast. I finally got mine working good, but its a about as Red Neck of a tent you will ever see
As for the paint tent, make sure you have really good airflow. The filler primer really plugs the filters fast. I finally got mine working good, but its a about as Red Neck of a tent you will ever see
-
mac
- Seasoned Member
- Posts: 60
- Joined: Sun Jul 29, 2012 7:57 pm
- Location: Grass Valley, CA.
Re: Super STOL Build Pics
Thanks Troy. Good info for all!
Got most everything in order except the air filters.........and an current gun. Still in the design phase on the filter bank. Good to know the Stewart's filler primer needs special attention. Will compensate with more exit filter area than originally planned.
BTW.......nothing wrong with Red Neck paint booths. If it stops the bugs and controls the overspray.........sounds near perfect to me!
Thanks again.
Mark M.
N49SS in Phase 2....for good!
N49SS in Phase 2....for good!
-
moving2time
- Veteran Member
- Posts: 243
- Joined: Fri Oct 15, 2010 5:42 pm
Re: Super STOL Build Pics
Last Saturday I went to see an S-6S project that was nearly complete and painted at a nearby airport. While admiring the gentleman's work we talked about the painting process. He did not use Stewarts and he explained to me that even using Stewarts you needed to use an air supplied respirator. I remember reading a comment on this forum that you could paint with the Stewart system in your living room it is so much safer. I even remember Steve Henry and I talking about Stewarts at Oshkosh last year and he said he loved it. I see from Tory's photos that he used a respirator but it doesn't look like it is using supplied air. Obviously there are paint particles in the air so the suit and respirator make sense but are there still dangerous chemicals in the Stewarts system? Is an air supply required or recommended? Joe B 
-
Familyflyer
- Veteran Member
- Posts: 211
- Joined: Thu May 16, 2013 5:10 pm
Re: Super STOL Build Pics
Stewarts say with good ventialtion you just need charcoal. As soon as I air out the garage fully (all doors open) for say 30 seconds, the garage has no sign of a painting smell. Nothing. I vent outside through a duct while painting, filtered first. Eurathane smell stays for ever. My wife has no trouble with me painting this at home since there is no lingering smell. If I was doing this for a living everyday, I would likely use a fresh air just because it is the safest. I don't know of anyone using fresh air with the Stewarts system.
-
bluemax
- Veteran Member
- Posts: 221
- Joined: Thu Mar 10, 2011 7:54 pm
- Location: Newark, Ohio
Re: Super STOL Build Pics
We're getting a little off topic but I figured this might be a good place to throw in my two cents, with a word of warning. I have a Citation HVLP spraying system and a Lex air gun. The supply air for the paint gun is something like 100 CFM but only 2-3 PSI. There is very little overspray. I have painted to aircraft with this gun using PPG polyurethane products (Durethane, then Delfleet). The paints are wonderful, and I was thinking that once the small amount of overspray was exhausted out of the homemade spray booth, I would be okay to remove my fresh-air supplied mask. I was wrong, and I paid the price later that night when I couldn't breathe. The fumes are dangerous....you are still at risk even when the visible overspray is gone. Just be careful. I had to take a course of steroids to clear up my breathing, and after that I was diagnosed an auto-immune disease called Sarcoidosis. My doctor said that the painting did not cause my disease, but since they don't know what causes it that's good a reason as any.
This go round I am not sure what paint system I will be using...... probably Stewart's. But if I end up using PPG polyurethane again I will be sure to keep my mask on.... At least until the paint has dried and I can move the parts and pieces out into the fresh air.
This go round I am not sure what paint system I will be using...... probably Stewart's. But if I end up using PPG polyurethane again I will be sure to keep my mask on.... At least until the paint has dried and I can move the parts and pieces out into the fresh air.
Max Rentz
Newark, Ohio
Newark, Ohio
-
mac
- Seasoned Member
- Posts: 60
- Joined: Sun Jul 29, 2012 7:57 pm
- Location: Grass Valley, CA.
Re: Super STOL Build Pics
Yes.....a bit off subject, but important. While the Stewart's folks suggest that a charcoal mask is sufficient for applying their paints, I decided years ago to err on the side of caution with polyurethane paints. The key ingredient in polyurethane paints, that make the products so wonderful, are isocyanates. Isocyanates are not "human-friendly" compounds. As such, when applying, I have always chosen to use some kind of "outside-air" respirator in the process. Yes, charcoal filters will remove these compounds from your breathing air stream, but knowing when the filter is saturated is always an unknown. Probably best to quote what 3M has to say on the subject:
The odor threshold for isocyanates (ie the level at which an individual can smell an isocyanate), is typically higher than the
allowed exposure limits. In other words, if a painter smells the sweet, fruity, pungent odor of an isocyanate, they are probably
already overexposed. That is why the recommended respiratory protection for employees spraying isocyanates is a supplied air respirator and not an air purifying respirator (i.e filter cartridge style). The issue with use of air purifying respirators is
that they will reach a point at which the filter becomes saturated and will no longer capture the isocyanate or other solvents. When that filter breakthrough happens, an overexposure can occur, potentially causing an irreversible sensitization. Use of a supplied air system removes this filter change factor - it does not rely on the painter changing his gas/vapor filters at appropriate intervals
I've used all kinds of outside air respirators in my life, but a few years ago I scaled way back to a simple, Hobby Air product line available through Aircraft Spruce and elsewhere. Yes, it's a bit clumsy, but a great excuse for an occasional run in the paint! If you do choose to use a charcoal mask, I'd recommend you change it often (like maybe weekly) and store the mask in a seal container (i.e. zip-lock bag or coffee can with a plastic lid) when not in use. Remember, charcoal is a sponge and will pull contaminates out of the air in your garage or hangar, if left sitting on a bench.......thus reducing it's useful life.
Just my 2 cents and nothing more! Caution is the key here, whether you choose the outside air route or the charcoal mask approach.
Bottom line.............we need for Troy to keep posting pictures!!
Mark M.
N49SS in Phase 2....for good!
N49SS in Phase 2....for good!
-
Familyflyer
- Veteran Member
- Posts: 211
- Joined: Thu May 16, 2013 5:10 pm
Re: Super STOL Build Pics
Found these notes on other forums and Stewart Site.
"The poisons (Isocyanates) in Stewart Systems paint are encapsulated by the water that is used to reduce it to spraying viscosity. A respirator is used to keep the particulates out of your lungs. There is no need to use a fresh air breathing system with our products. It is the only Polyurethane paint that works this way, everything else is seriously poisonous."
"Isocyanates are part of the chemistry in the catalyst.
Waterborne paint Isocyanates are less hazardous than solvent borne, but that being said they are still not good for you. The good news is that to neutralize the Isocyanate you use 50% water by volume. So when using waterborne catalyzed paint that uses water as a reducer at a 1:1 ratio with the catalyst like we do you end up neutralizing and encapsulating the Iso's. So do not get any water near the catalyst or in the bottle because it will ruin it. Once the catalyst and resin are mixed only then can you add water to reduce to a sprayable viscosity.
Isocyanates are attracted to moisture. With solvent based paint systems your body is the source of moisture and Isocyanates are able to soak through your clothes and skin and into your blood stream. If you wear the same shoes painting with solvents every day even the overspray that soaks through your shoes and socks will get into your blood stream and can make you sick."
Not sure if I should use the fresh air for the top coat or not.
Don't worry guys, I will get back to posting pictures when I got more to show than priming
-
Familyflyer
- Veteran Member
- Posts: 211
- Joined: Thu May 16, 2013 5:10 pm
Re: Super STOL Build Pics
Here is pictures of how I faired the trailing edge of the gear legs and I built in a step location for getting into the airplane. The step will get stick on grip tape for traction.
Here is a top view.

The fairing.

What it looks like covered.

I had to shim up the plate slightly so it would sit flush with the outside tube. Everything was Hysoled in place.
I am almost done priming all the parts. Finish coat should go on in April. This was a nice break from painting.
Here is a top view.
The fairing.
What it looks like covered.
I had to shim up the plate slightly so it would sit flush with the outside tube. Everything was Hysoled in place.
I am almost done priming all the parts. Finish coat should go on in April. This was a nice break from painting.
-
Bay State Flatlander
- Forum Regular
- Posts: 20
- Joined: Tue Jan 21, 2014 12:18 am
- Location: Central Massachusetts
Re: Super STOL Build Pics
Troy,
Awesome work. I'm a newbie at the building process other than radio controlled gliders and such so am pretty steep on the learning curve. How did you make the slots in the alum flooring next to the seats for the rudder cables?
-Drill and Dremel
-End mill
-Router
-Other
Thanks,
Martin
Kit 331
Awesome work. I'm a newbie at the building process other than radio controlled gliders and such so am pretty steep on the learning curve. How did you make the slots in the alum flooring next to the seats for the rudder cables?
-Drill and Dremel
-End mill
-Router
-Other
Thanks,
Martin
Kit 331
-
Familyflyer
- Veteran Member
- Posts: 211
- Joined: Thu May 16, 2013 5:10 pm
Re: Super STOL Build Pics
I drilled out the end of the slot with a unibit and cut the slot with a zip disc on an angle die grinder. I use the discs than vans aircraft sells for cutting the canopy. It works great on aluminum too.