Hi Jack, this is what I did. It is simply made from scrap aluminium to which is attached a 1/16 pulley wheel. I have riveted it to the underside of the floor, with reinforcement plate on top. The cable then attaches to handle which goes to a hook attached to bottom of instrument panel. I modified the rear pulley system as I didnt like the zenair setup. Cheers Pete
Thanks for sharing your pictures, your floats look really nice and you did a great job. Unless someone has a better way I will likely go with the method that you and Dane brought up to raise and lower the water rudders. Sometimes the simpler things work best in the end. Were your floats built from the predrilled kit or from the basic parts kit?
I spoke to Michael Heintz yesterday at Zenair floats and he told me that FL112 is specific to the CH 750 and that they don't normally send that drawing to customers building floats for other aircraft types. He offered to send the drawing to me but after he read the measurements I told him that it was not necessary. Perhaps you can confirm this but he told me that they set the floats 78"apart on center, a point 2-3" forward of the step is aligned with the aircrafts most aft CG, the angle of the floats are set 3 to 4 degrees below the aircrafts longitudinal axis and the floats were set 23.5 inches below a point on the back of the CH 750 aircraft. He stated that the Zenair distance from float to aircraft on the CH750 might not apply to the Highlander due to the steep lower longeron on the CH750. The other measurements are close to what we have been talking about in this post.
Hi Jack, my kit was predrilled, but I ended up having to redo a lot of bits. Hopefully quality control has improved at Zenair. To their credit, there was no questions asked, and they sent me replacement material. I went through the same process you are going through, and it looks like you have read all the same material. As it turns out, the Zenair dimensions obey most of the accepted float rigging rules. Michael is correct in his approx dimensions. (2000mm float to float centreline, 600mm float to fuselage at rear attach point, 3-4 deg float angle, and step 2" fwd of most aft cg) The setup seems to work well on the Highlander, but as I said earlier, I have not yet tested them. Everything is complete and ready to bolt on and fly, but I am waiting to fly off a few more hours on wheels. I have only just clocked 25hrs on the airframe. I will fit them later in the year. Below is a pic taken during fit up.
Keep us informed on your progress and we will do the same at this end. Myself and another builder experienced the same quality issues that you likely did but like you said, to their credit Zenair resolved all that we asked of them.
Even simpler is to use a ring on the end of the cable and a hook to hold the rudders in the up position. A 2" chrome ring like the kind sold at hardware stores and a small coat hook with smooth rounded tip works well. The ring is easy to grab and pull with one or two fingers. Many times levers are more difficult to use because of their location. Also, you would think that with the mechanical advantage of a lever it would take less effort to raise the rudders, but since there is usually a lot of travel in the system, the cable must be attached so high on the lever that it feels hard pretty hard to move. Also the lever is on the floor whether the rudders are up or down. The only way to check the position in flight is to reach down and feel it. With the ring/knob system, you have an opportunity to mount the hook in a visible location so the pilot can glance at it to check position. I instructed in a plane that had the rudder lever between the seats in a spot that was so tight, the only way to reach it was to jam you arm between the seats. To make it even more interesting, there was some sharp edges on the seat frames right next to the lever in the up (rearward) position. That would shred the skin on your hand if your weren't careful. There were a few students that got a little anemic by the time they took their check ride. More evidence that mechanics hate pilots! I'm still building my plane so I haven't really given it much thought, but my first choice would be to run the cable up from just in front of the fuel valve to a hook on the center/bottom of the panel. It would have to clear the flap handle but that would be a handy spot.
John Nealon
Wasilla, Alaska
Highlander Extreme #191
mykitlog.com/jnealon
Congratulations on getting your HIghlander operating on Amphibs. Nice glassy water landing in the video. I'm curious as to your new empty weight with the amphibs compared to empty weight on wheels.
John Nealon
Wasilla, Alaska
Highlander Extreme #191
mykitlog.com/jnealon
Basic weight is now 100kg more, for floats/undercarriage/hydraulic pump etc. The front lower attachment brackets came from Zenair, but all the others I had to make.
Pete, there are plenty of good-looking Highlanders, but your black beauty on floats really shows the design off. Nicely done. More pictures would be good...
Richard Holtz
Highlander N570L -- Ms. Tonka -- in gestation
If just enough is really good, then too much ought to be perfect.
Can you confirm that you positioned the step 2" fwd of most aft cg? Zenair's recommendation was 2-4" aft of the most aft cg.
Are you happy with the performance? Your aircraft looks amazing!
Jack
pt17 wrote:Hi Jack, my kit was predrilled, but I ended up having to redo a lot of bits. Hopefully quality control has improved at Zenair. To their credit, there was no questions asked, and they sent me replacement material. I went through the same process you are going through, and it looks like you have read all the same material. As it turns out, the Zenair dimensions obey most of the accepted float rigging rules. Michael is correct in his approx dimensions. (2000mm float to float centreline, 600mm float to fuselage at rear attach point, 3-4 deg float angle, and step 2" fwd of most aft cg) The setup seems to work well on the Highlander, but as I said earlier, I have not yet tested them. Everything is complete and ready to bolt on and fly, but I am waiting to fly off a few more hours on wheels. I have only just clocked 25hrs on the airframe. I will fit them later in the year. Below is a pic taken during fit up.
Hi Jack, I only just found your question, as I only visit the web site now and then. To answer your question, Yes I did position the Step 2" in front of the most aft c of g. The end result is that the Empty Weight CofG is right on the Fwd Limit. (I do have an Airmaster prop, and Battery on the firewall though) so that also moves the CofG fwd. in fact the setup is pretty much the same as the CofG when it's on wheels. I've finished the flight testing now, and will not change anything. I did fabricate a larger Header tank which I have installed on the rear bulkhead. It was more so for the extra fuel rather than for CofG. If I was to do it again I would still use the same setup, as I can load it up without any CofG issues.
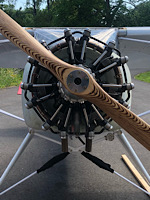
Hi Paul, I have an Airmaster constant speed prop, which now has 71" diameter. Airmaster used my 70" Warp Drive blades to fit to the hub. I did get the ground reversible option, which works well.