

Hey Guys,
Am I missing something? (probably).
I can't see any way to keep the rudder pedals from falling back (other than the stiffness of the assembly).
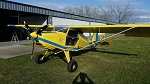
And I noticed all the finished aircraft that I have pictures of have the same problem, - slack rudder cables.
This became particularly noticeable at Sebring Expo show we had here with all the wind and rudders were flapping around all over the place.
The assembly manual talks about a bungy cord going thru the firewall to pull the pedals forward, but that is a dumb idea and I noticed all the finished planes I've seen do not have this.
So, the compulsive "I can do this better" part of me mocked up some additional rigging that "closes the loop" on the rudder cables and keeps the pedals in position or at least tracking the rudder. I've used nylon cord in the mock-up, but that would become wire or strong dacron rope in the finished version.
Any comments?
Wes
Assembly Questions
-
Wes

- Premium Member
- Posts: 231
- Joined: Mon Jan 23, 2006 10:32 pm
- Location: Satellite Bch, Florida
Assembly Questions
You do not have the required permissions to view the files attached to this post.
Last edited by Wes on Fri Jul 28, 2006 11:04 pm, edited 1 time in total.
Kit # 95
Low and Slow - The only way to go!
Low and Slow - The only way to go!
-
alan
- Veteran Member
- Posts: 398
- Joined: Fri Feb 04, 2005 1:39 am
- Location: Baytown, TX
Wes,
I agree with the "dumb idea" part of the question. I have no plans to poke a bungie cord through
my firewall. I had thought of something like you have done but never got around to doing it. Now
that I have seen how you intend to do yours, I might try the same. It will require mounting a
bracket on the firewall to hold the pulleys and a turnbuckle to adjust the slack, just in case the
pedals must be adjusted in the future. I had been planning to put a couple of springs on the brackets
and I still might do it that way. Decisions, decisions. I guess I will know how I intend to handle it
after I'm done.
N1010Z is covered, painted, and in the process of being assembled, again. We should have the
wings installed tomorrow and the rest of the controls rigged this week. Yahoo!
If I had known I would live this long I would have taken better care of myself.
-
Wes
- Premium Member
- Posts: 231
- Joined: Mon Jan 23, 2006 10:32 pm
- Location: Satellite Bch, Florida
Good Progress
Alan,
Thanks for the reply.
I've decided to go ahead with a polyesther cord rig since I don't have the space for a proper sized pulley for 3/32 wire.
Wow, I wish I was at your stage of assembly, I haven't even unrolled that huge roll of fabric. Maybe by fall.
Sorry about the HUGE pic' in the post, I keep forgetting to downsize.
Ran into another little snag when assembling the tail feathers. The book says to install a EP040504 bronze bushing in the elevator horn. The rod end fork and the horn and the attaching bolt are all 1/4 inch and the bushing provided is for 3/16 hardware, - won't fit! My guess is they put the wrong bushing in the package in the kit, but in any case I know I have to ream a bigger hole in the horn to accomodate a proper sized bushing.
Wes
Kit # 95
Low and Slow - The only way to go!
Low and Slow - The only way to go!
-
Wes
- Premium Member
- Posts: 231
- Joined: Mon Jan 23, 2006 10:32 pm
- Location: Satellite Bch, Florida
Wing Tank Mounting
All,
I was working on my wing tanks again, trying to figure out how to mount them in the wing.
The manual gives very little guidance here.
All of the finished airplanes, that I have pictures of, show the filler caps positioned outboard. I see no reason that the tank couldn't be mounted on the opposite wing with the filler caps inboard. This would certainly help with the fuel dribbling from the folded wing since the tank opening and vent would now be at the highest point on the wing (when folded).
Any thoughts here?
Oh, and a caution when playing with the tanks, - they are obviously designed for ambient pressure service (gravity feed) and will not stand any internal pressure. I found out the hard way when trying to leak check a tank with some fuel and the baffles came unglued inside when the vapour pressure of the fuel expanded the tank! :(
Wes
Kit # 95
Low and Slow - The only way to go!
Low and Slow - The only way to go!
-
alan
- Veteran Member
- Posts: 398
- Joined: Fri Feb 04, 2005 1:39 am
- Location: Baytown, TX
Wes,
The only problem with putting the filler caps inboard is the diahedral of the wings will cause
your fuel to "dribble" out when you are flying or in the flying configuration. The best thing, in
my opinion, would be to not fuel the aircraft until you are ready to fly and then make sure the
fuel level is 1/2 tank or lower before trailering.
Alan
If I had known I would live this long I would have taken better care of myself.